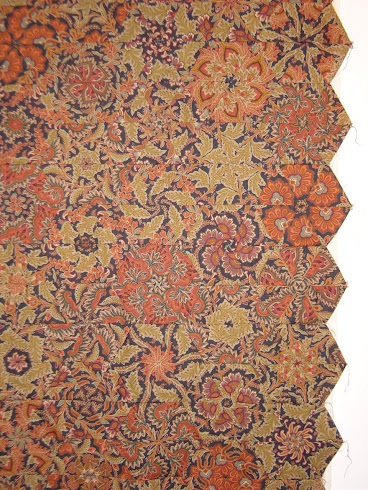
Have you wanted to learn free motion quilting on your domestic machine, only to be told it will take 100 hours of quilting to get good at it? I was told just that. I am a busy working single mom. I want my beautiful quilt tops turned into quilts...NOW! I started taking classes right from the beginning, many quilt tops created in those learning classes. To pay someone to quilt them custom, the way I visualized them quilted, was not in the budget. I took a beginners quilting class on my old domestic machine. It was a frustrating disaster. My old white machine pieced like a dream, so why would'nt it quilt my practice sandwich? In the past year I have figured out quite a few things to answer that burning question. First and foremost, you must STARCH your backs AND your tops. I cannot stress this enough. Your fabric must be as stiff as paper, DO NOT use sizing. Allow the starch to "sink into the fibers", I use non aerosol Niagra that is twice as cheap for double the amount, it comes in a pump type spray bottle, I then add 1 TBS of liquid blue laundry starch to the purchased bottle and shake well. Spray your fabric from the back/wrong side of fabric, and iron from wrong side, this prevents shiny spots and starch flaking, especially if the starch has adequate time to "sink in" prior to ironing. Do not prepare top or back this way until ready to quilt. Bugs like silverfish are attracted to eat your fabric due to the starch which is made from vegetable byproducts like potatoes and corn. I wash all my fabrics to be used in applique and piecing, then starch, prior to cutting. It improves accuracy and sewing stiff verses floppy fabric minimizes stretching and puckers. Second, I baste my quilts the way Sharon Schamber taught me, I use ultra thin crochet cotton to herringbone baste my 3 layers together. I use 100% cotton batting, I am going to try bamboo and wool soon. I have been told by a few people the bamboo batting has an odor when it gets wet. If anyone can elaborate on this feel free to offer your comments. Now with a stiff as paper backing, you should have zero puckers. If you are lucky enough to have a frame system to machine quilt, this can still help with keeping your back straight and square on the frame, minimizing distortion after quilting is done. Third, Machingers quilters gloves are the bomb! I have 2 pair sizes xs and sm.
These grip the quilt so well, yet they are light weight and very cool and comfortable. They are thin, stretchy with tips encircled with a gripping substance. This encircling allows you to flip your gloves over and use the other side, TWICE THE WEAR! A bargain in these lean times. Fourth, Sharon Schamber's quilt "Halo", this ring is weighted (less pressure the quilter has to apply) coated with a gripping substance, it grips the fabric so well, your Machingers grip it, giving total control of the quilt top. These two together gives you such unbelievable improvement in your quilting and stitch length regulation. I say those alone take 60 hours off the 100 hrs I was told to practice. Fifth, Sharon Schamber recommends Bobbin Genie silicone washers, you put a smidgeon of sewing machine oil in your bobbin case then lay a bobbin Genie washer into the bobbin case then your actual bobbin. These allow you to take tight turns and sharp points without your machine jamming or producing ugly and frustrating "birds nests" in your work. That happens from friction and sudden tension changes from fast moving shape changes. They are worth their weight in gold and a package holds 15-20 I believe, share a bag with your buddies and they will love you. Remember to use tiny dot of oil with them. Sixth, I highly recommend the Super Slider mat that you place on your sewing machine bed. It sticks by itself, but I always, always tape mine down with Scot's Magic tape. I pushed so hard on my top one day, that it moved the Slider and I sewed it to my quilt. I bought a new one, and now I tape both to my machine bed for even easier manipulation of my quilt. That knocked another 20 hrs of practice off my learning curve. I went from never having quilted in my life, to very good intermediate quilter in just one lap size quilt using all the above in congruence with each other. By my third quilt, I was an advanced machine quilter. I create my own designs, and use some I purchased from Sharon Schamber's website: www.sharonschambernetwork.com. She has recently announced she can cut you a SuperSlider any size you wish. I am going to get a new one cut the size of my Brother QC1000's large quilting bed with a one inch lap over on 3 sides to make taping down the sides smoother. Don't use painter or masking tape, they both have rough texture, and can cause surface tention and hangups. The magic tape is flat and slick, doesn't leave a sticky residue on machine bed. Last but great tip is...Do Not sew/quilt with an old needle, I change to a new needle every 8 hours of sewinhg roughly. Use high quality needles,
cheap or poor quality needles cause grief. ONLY USE SINGER NEEDLES IN A SINGER MACHINE. They have a special mark on them that cause them to fit poorly in any other brand. I threw away all my poor quality and singer needles the day I brought my QC1000 home. I recommend Schmetz titanium needles in various sizes. Use a thin 60/8 on tightly woven batiks, a 60/8, 70/10, 75/11, 80/12 for monofiliment and machine applique (my next blog will be on some cool applique techniques), piecing cottons and applying borders, 75/11, or 80/12, you need strength to go through multiple layers and not flex or break, 90/14 for piecing (washed and pre-shrunk) flannel, denim, duck cloth, canvas and embellishing with decorative threads. Please read my previous blog note on how to "follow the lines" quilt with very intricate designs. You'll look like a star machine quilter from the get-go! I also "play" quilt by using the above without thread in the needle to "get the feel of the movement" and figure out if I need to re-bunch the whole of the quilt to allow for easier movement and smoother quilting. Go slow until you get the feel, then speed up. Mock quilt on the lines for as long as it takes to get comfortable or quilt a bunch of different designs on squares and create a "quilt-as-you-go" quilt to mark your journey.
Hope this helps. Add your comments, suggestions or requests for future help blogs.
Have fun,
Artsy-Fartsy chix


How to Combine Colors for Stunning Quilts
-
This paragraph serves as an introduction to your blog post. Begin by
discussing the primary theme or topic that you plan to cover, ensuring it
captures t...
3 months ago


